
1. Bloggers, based on an article in yesterdays' newspaper, can be viewed the same as Journalists, and being a Journalist is a noble and note-worthy practice.
2. I desire a way to share myself, my family and my loves and interests with those I care for (and for those who care to come!) and this is the easiest, cheapest, and most practical way to do that, considering my family and friends are mostly long distances from my 'umble dwelling place.
3. My friend Alex has a blog and I want to have one too. I might be twenty-one, but the old childhood oft'heard phrase of "hey, I want one too" still holds true for me, at least in some respects.
So, there my justifications. And to proceed. . .
I plan on using this blog to share the joys and trials of motherhood for the benefit of my family and friends who wish to track Little David's progress and new accomplishments, and to also share my love of historical sewing and living history. Here I plan on posting pictures of new projects and descriptions of events I attend, as well as sometimes muse, either boringly or not, and to sometimes share a recipe I have thought peculiarly good. I also often succumb to the desire to write poetry - whether good or not, you can be the judge - and so be warned, my creative writings might be found here in later days.

Tonight I am going to post some pictures of one of my 'recent' projects. I completed the main project last summer, but since then have twitted with it and adjusted it to suit the tastes of my beloved but finicky husband. I don't have many photos of more recent projects, so this is what you get for now!
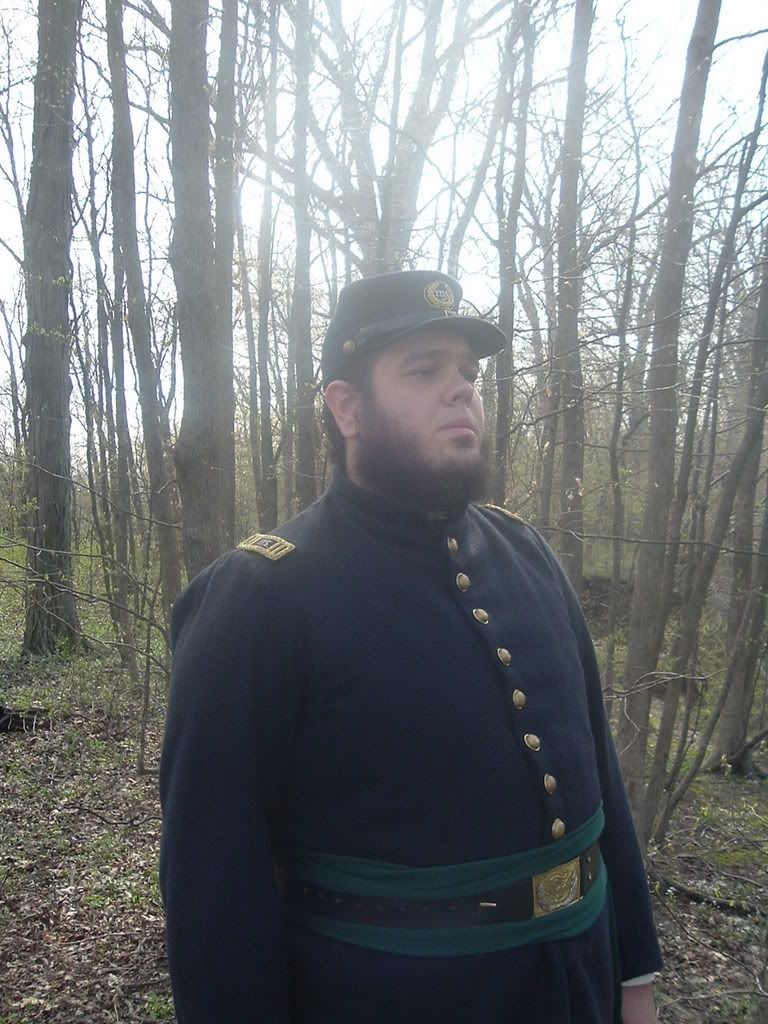
The project was a Jr. Officer's uniform for my husbands Federal Asst. Surgeon impression. The construction of the frock coat, military vest and trousers was a labor of love (although I was mostly in a bad mood the entire time I worked on it, owing to the fact I was seven months pregnant and it was in the blazing heat of mid August when I had to make all this in less than a week, due to my own procrastination). The pattern for the vest was draped on David with muslin to create his own customized pattern, and for the remainder of his ensemble I used Period Impressions Jr. Officers Frock Coat pattern and Period Impressions Civilian Trouser pattern.
My second warning of the evening - DO NOT USE THE JR. OFFICERS FROCK COAT PATTERN FOR ANYTHING BUT KINDLING. Or toilet paper, if needed. IT IS TERRIBLY CONFUSING AND NOT A VERY ACCURATE PATTERN FOR A FEDERAL IMPRESSION!
David wanted "dog ear" or flap pockets on his trousers, and gold piping down the leg seam. We purchased his wool from County Cloth and the metallic cording from Quartermaster Shop. The staff officer buttons we also purchased from Quartermaster Shop. (www.quartermastershop.com)
I had to re-draw most of the frock coat pattern to fit David
 correctly. I also had to adjust the back pocket flaps and redraw the shape, as well as make the back pocket flaps have only 2 buttons per flap instead of 3. I also *should* have made a muslin of the sleeves first, since they were far too large for the armscyes and needed to be gently gathered to fit, resulting in a slightly "poofy" sleeve that annoys David to this day. Because of the way the sleeve is cut, I cannot take this fullness out and David will have to live with it until we make a new Frock coat for him. I also had to make my own pattern piece for the 2" wide cuff that goes on the end of the sleeve.
Casting the inadequate instuctions to the wind, I put together the coat based on photos we saw of originals and documented reproductions. The coat is fully lined with black cotton in the main body and white muslin in the sleeves and is padded and quilted with wool and interfaced with light buckram for smooth shaping in
 the chest area. I had to remake the coat a total of 4 times before it reached our combined standards, but at last it is as good as I can get it, and my husband does look nice in it, if I do say so myself.
Well, that is all for this evening. The baby is asleep on the floor in front of the fan and needs to be put to bed in his crib. It is so hot and muggy tonight but we are supposed to get thunderstorms that will hopefully cool things down. Yay!!
Good night all!
Love,
Sarah